Rosetta Stone and GlyphViewer
As we talked into a previous post, Word of Ancient Egyptian Hieroglyphs, Hieroglyphs were at the heart of the Egyptian civilization. These elaborate symbols, though ideal for large inscriptions found in temples and monuments, were too difficult for day-to-day scribbling, so other scripts were evolved in Egypt in parallel. These were the ‘hieratic’ and ‘demotic’ scripts, which can crudely be thought of as merely different fonts of the hieroglyphic alphabet. Then after the rise of Christianity, which outlowed their use in order to eradicate the link with the pagan gods, ‘Coptic’ was used, a script consisting of 24 letters from the Greek alphabet supplemented by six demotic characters used for Egyptian sounds not expressed in Greek. So in the fourth century AD, within a generation, the Hieroglyphs scripts vanished, the last known writing is found on the island of Philae, date from AD 394.
Rebirth of an Ancient language
Following the complete loss of the language in the fourth century, in later times scholars who tried to deciphered them where confused by the fact that the language seemed to be a primitive picture writing, and their translations were the actual meaning of the signs and lolograms. In fact, the hieroglyphic script and its relatives are phonetic, which is to say that the characters largely represent distinct sounds, just like the letters in the English alphabet.
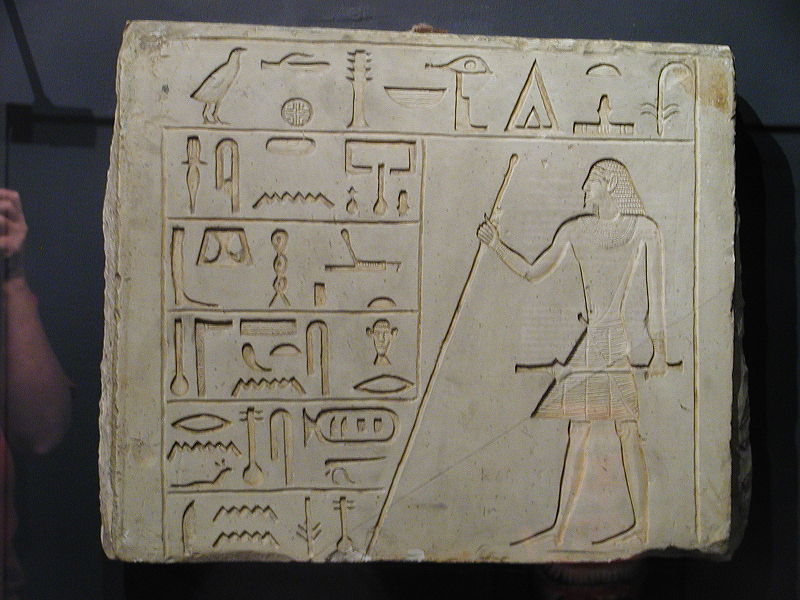
Rosetta stone
This single most famous slab of stone in the history of archeology was found by a troup of French soldiers stationed near the town of Rosetta in the Nile Delta in the summer of 1798. The soldiers were demolishing an ancient wall to clear the way for an extension to the fort, but built into the wall was a stone bearing a remarkable set of inscriptions. The same piece of text had been inscribed on the stone three times, in Greek, demotic and hieroglyphics:

Rosetta stone, scripts highlighted with GlyphViewer application
You may see the actual image published here: http://2glyph.com/pub?ID=bcbbed953febf6424ad630c84039baefec597a91
Even if Napoleon Bonaparte dispatched a team of historians, scientists to follow in the wake of his invading army the French were force to hand over the 118cm high, 77cm wide, 30 cm deep stone slab to the English who took it to the British Museum, where it remained ever since.
Translation Hieroglyphs, the problem

GlyphViewer and Thomas Young
Let’s try to guess what Thomas Young would have done if GlyphViewer application was available in his time. This will be a small tutorial on how you can use GlyphViewer application to help translate Ancient Egyptian Hieroglyphs.
First of all Thomas would have created a new project, as explained in the application’s tutorial. He would have created an account, thus getting some free credits to use the application which would allow him to actually translate a few words, enough to go down into history as a famous Egyptologist. He would have taken a close picture of the cartouche and added it to GlyphViewer using Add Image from Image menu. He would then go to the Translation Builder menu and click on the Identify Ancient Hieroglyphs option, or use the right corner stone buttons to open up Language and Glyph Builder dialog forms on the right side:

Notice the selected light blue area. This is what when you click Recognize for the right side the OCR engine will be given to try to match hieroglyphs. All you need to do is click on Recognize. Thomas would then noticed that some new glyphs are highlighted on the image, with a rectangular area. Possibly the OCR engine will not perform very well and Thomas would be required to do the glyph matching manually by using the Glyph Builder dialog, using dragging the rectangle or polygon around the desired glyph area, then clicking Add to create a new glyph. He would then click on it to add symbols he would though to have been correct.
Each such glyph would have had associated with it a number of symbols, each symbol having it’s own confidence level (the degree of confidence that that glyph matches with that symbol). The highest the confidence value the glyph will have a green color on the image. When you click on a glyph in an image a new dialog opens that you can see what symbols are matched: 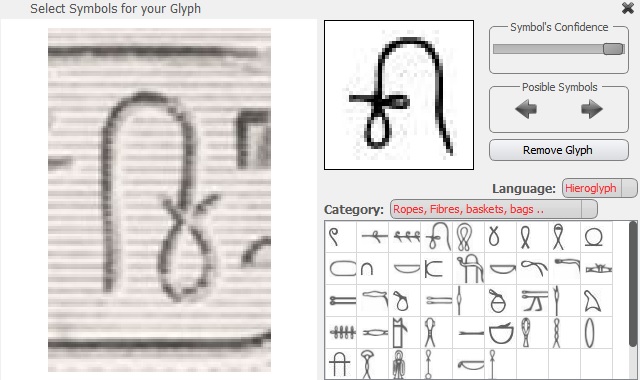
If you consider that a symbol match is wrong, just drag the confidence level to 0 and that symbol will be deleted for the glyph. If you consider that the found glyph is wrong all together just click on Remove Glyph and the symbol will be deleted. You should use the Category combo to search the symbol in what you consider the glyph looks like. Manually identifying glyphs can take some time at first (there are over 800 symbols to choose from) but you will see that the majority of glyphs have quite common symbols.
Now you have all the Ptolemy symbols, from right to left (the read direction is this due to the birds and animals orientation), in Gardiner’s notation: Q3, X1, V4, Aa16, E22, M17A, S39.
All you need to do now is select all the hieroglyphs, the same way you did in the Recognize part then click on Translate button in Language Dialog on the right. You will notice that a new text, Ptolemy, appeared on the Image next to the glyphs. If you click on it the following dialog will pop up:

You may hover over the symbols to see them in the original image.
Also notice that the word can be translated into multiple languages. You may edit a translation, or add more translations by choosing a new language from the Translated To: combo.
Now it’s time to actually build a translation.
Open the Translation Builder dialog on the right side by clicking on the brown area on the stone image on the upper right side. Then click on New Translation… button. A new dialog will appear:
 Now choose the language you want to create a translation from the Translated To: combo and enter it. You can also link words that you have previously translated. Find and click on the Ptolemy text in the image, notice how the GlyphWord dialog appears. Now select the portion of the text you want to link to this word then click on the Link button. That’s it, notice how the Ptolemy text got a blue underline, the link. When you will hover over the translation you will see that both the word and the associated glyphs in the word will become highlighted. Don’t forget to play with the font and color as well. Also you may translate it into as many languages as you like, just make sure to link the words again. You may use different font and colors for each translation.
You can see a sample of such a translation here: https://www.2glyph.com/pub?ID=de8c15efb53df18d2ff7f6c4f95b4aaee1ff2221